Canoe

Try to leave where you have been , No body was there to tell you it'll be a long way.


  • Home

  • Archives

  • Tags

  • c24's

  • Search

Flask Run

Posted on 2020-12-28 => 22:08:59
| Words count in article: 125

Quickstart

  • On PowerShell

    1
    2
    3
    4
    5
    6
    mkdir flk
    cd flk
    py -m venv venv
    pip install flask
    mk hello.py
    New-Item hello.py -type file
  • 在 hello.py 写入

    1
    2
    3
    4
    5
    6
    from flask import Flask
    app = Flask(__name__)

    @app.route('/')
    def hello_world():
    return 'Hello, World!'
  • run

    1
    2
    $env:FLASK_APP = "hello.py"
    flask run
  • get / post

    1
    2
    3
    4
    5
    6
    7
    8
    9
    10
    11
    12
    13
    14
    15
    16
    17
    18
    19
    20
    21
    22
    23
    24
    @app.route('/')
    def hello_world():
    return 'Hello, World!'


    @app.route('/name')
    def elias():
    return 'Hello, elias!'

    @app.route('/name/<username>') #<>内默认 String
    def elias(username):
    return 'Hello, %s!' % username

    # @app.route('/name/<float:a>') #float
    @app.route('/name/<int:a>') # int
    def elias(a):
    return 'Hello, %s!' % (a + a)

    @app.route('/login', methods=['GET', 'POST'])
    def login():
    if request.method == 'POST':
    return "A"
    else:
    return "B"

Reference

  • flask教程
  • 👉Flask

Scrapy Learning Log

Posted on 2020-12-27 => 21:53:56
| Words count in article: 452

Scrapy 调试

通过 Shell 层层调试

  • scrapy shell http://doc.scrapy.org/en/latest/_static/selectors-sample1.html
  • 然后用选择器筛选

IDE debug 启动 Shell

  • 在代码中加入

    1
    2
    from scrapy.shell import inspect_response
    inspect_response(response, self)
  • scrapy crwal AAA 启动项目

  • 然后项目执行到上面两句插入的位置的时候,就会启动 Shell
  • 接着就在 Shell 里调试
Read more »

Step into Scrapy

Posted on 2020-12-26 => 19:24:56
| Words count in article: 215

配置

  • pip install scrapy
  • scrapy 查看用法
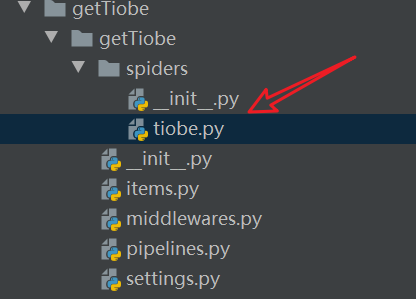
  • scrapy startproject getTiobe 新建 scrapy 项目
  • cd getTiobe\spiders 进入该目录
  • scrapy genspider tiobe www.tiobe.com/tiobe-index 生成该链接的爬虫文件
    Read more »

Batch Note

Posted on 2020-12-13 => 01:17:13
| Words count in article: 724

搜索当前目录下的所有文件

1
2
for %%i in (*.*) do echo "%%i"
pause

搜索当前目录下被筛选的文件

1
2
for %%i in (*.md) do echo "%%i"
pause

可用正则表达式

Read more »

Fish:The Friendly Interactive Shell

Posted on 2020-12-12 => 02:18:43
| Words count in article: 62
  • $ sudo apt-get install fish
  • fish 启动 fish
  • 有下划线提示表明路径存在

  • 无效命令显示红色,有效命令为蓝色

  • 输入命令后,fish 会有历史记录提示和猜测提示,按下 tab 也有提示

I got a Raspberry Pi

Posted on 2020-12-11 => 22:34:39
| Words count in article: 2.2k

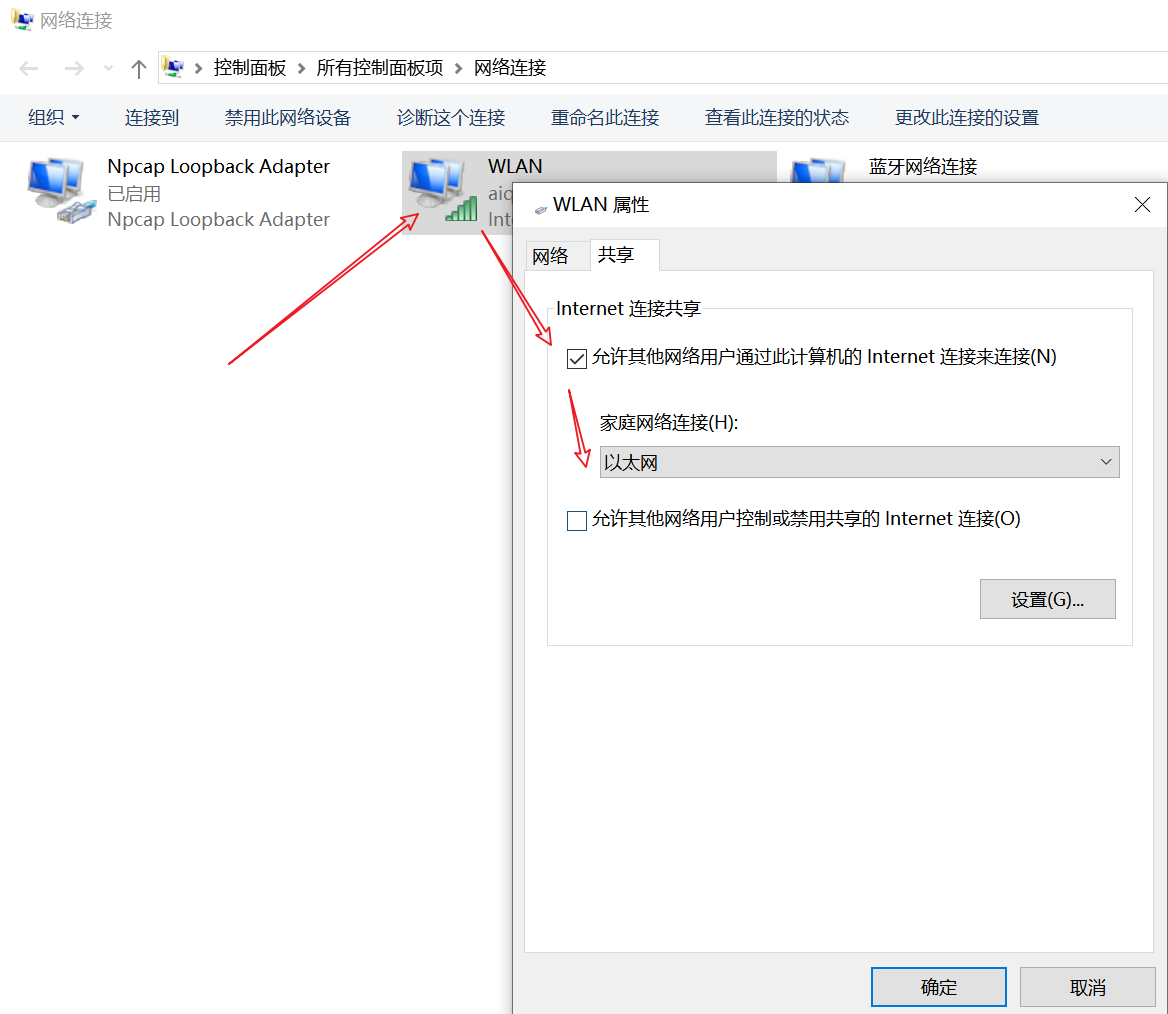
通过网络分享连接树莓派

  • 确保一台能上网的主机
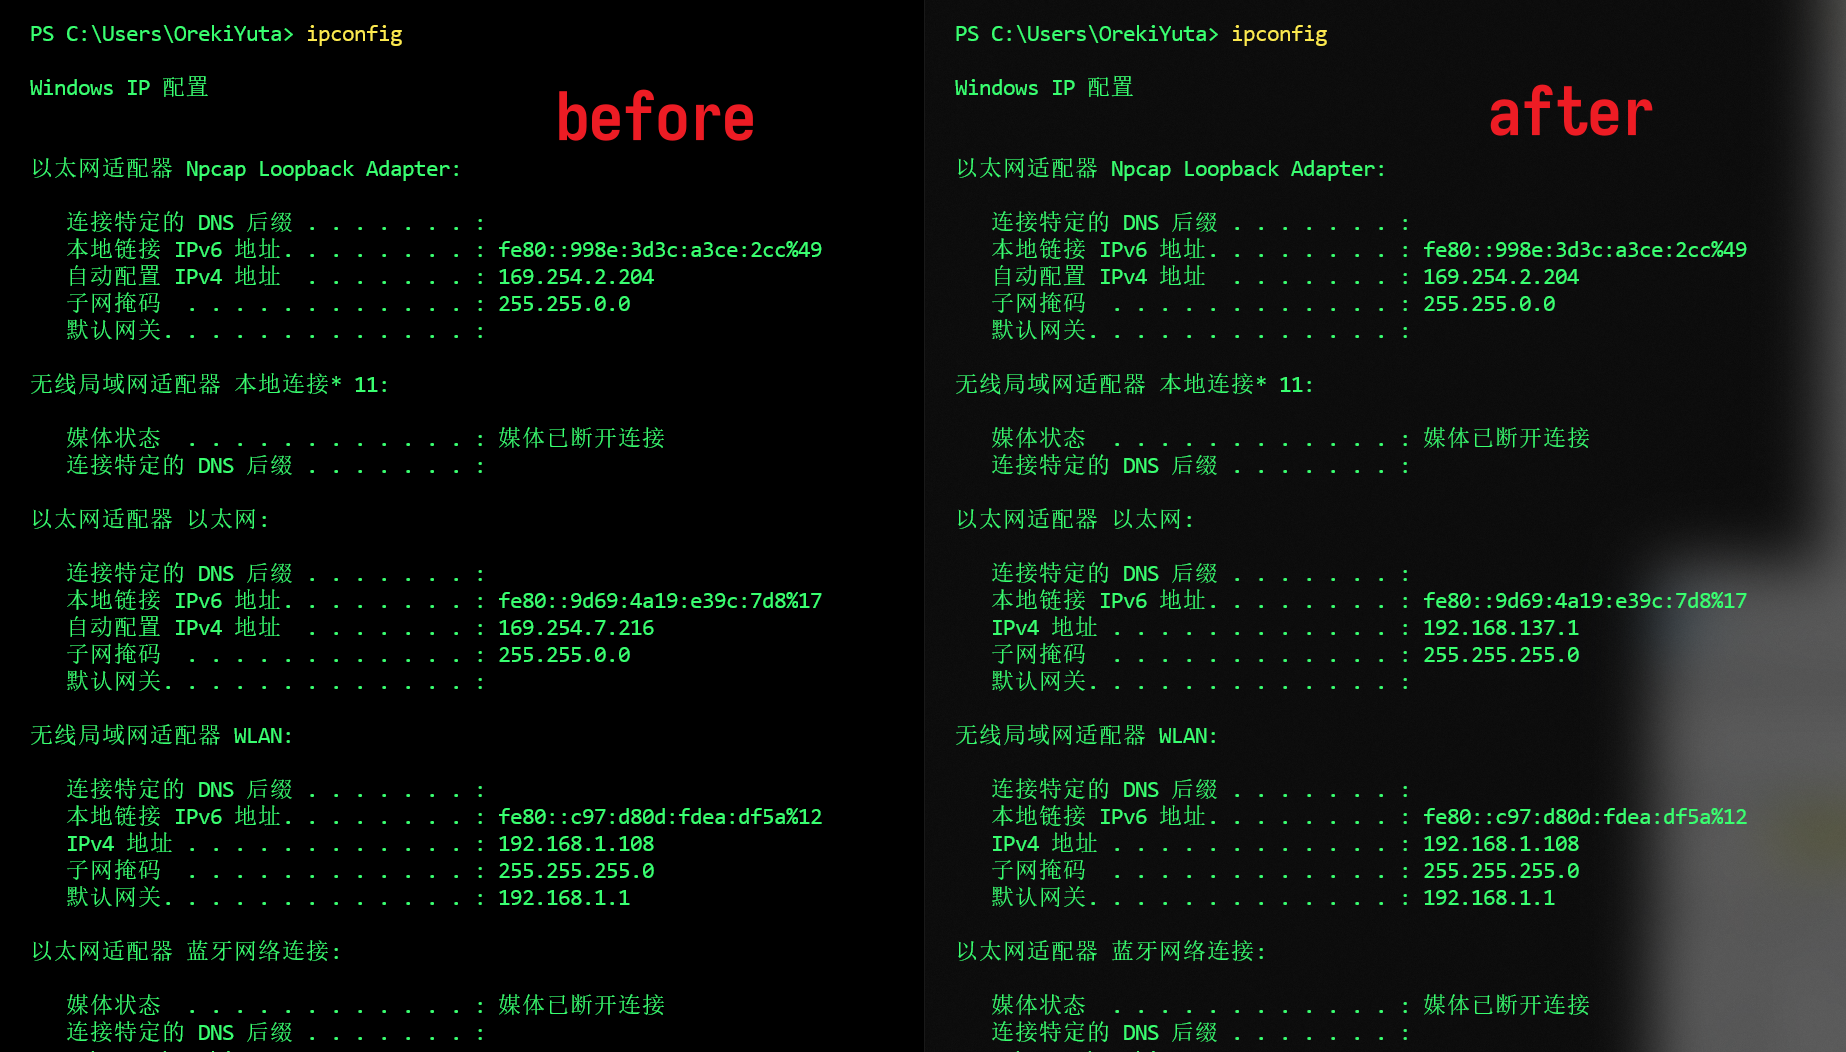
  • 把已经连接的网络通过想要共享的形式共享出去
  • 开启共享前后的本机 ipv4
Read more »

JavaScript get/set

Posted on 2020-12-05 => 22:03:45
| Words count in article: 1.3k

用原生 JavaScript 实现数据-单向绑定

  • 首先得知道,在 JavaScript 中为一个对象赋值会触发对象的 set 属性方法,而获取对象则会触发 get 属性方法
1
2
3
4
<input  id="inputurl">
<input id="inputpost">
<input id="inputparam">
<p id ="texturi"></p>
  • 实现单向绑定只需要设置 get 属性方法即可
  • 通过监听元素的 keyup 动作,然后执行方法,在方法中获取对象即可触发 get 属性方法
1
2
3
4
5
6
7
8
9
10
11
12
13
14
15
16
17
18
19
20
21
22
23
24
25
26
27
28
29
var url = {
get inputValue() {
xurl = document.getElementById('inputurl').value;
return xurl;
}
}
var post = {
get inputValue() {
return document.getElementById('inputpost').value;
}
}
var param = {
get inputValue() {
return document.getElementById('inputparam').value;
}
}

document.getElementById('inputurl').addEventListener('keyup',function() {
uri = url.inputValue + post.inputValue + param.inputValue
document.getElementById('texturi').innerHTML = uri
})
document.getElementById('inputpost').addEventListener('keyup',function() {
uri = url.inputValue + post.inputValue + param.inputValue
document.getElementById('texturi').innerHTML = uri
})
document.getElementById('inputparam').addEventListener('keyup',function() {
uri = url.inputValue + post.inputValue + param.inputValue
document.getElementById('texturi').innerHTML = uri
})
Read more »

Java:Thread.Start() / run()

Posted on 2020-11-30 => 23:19:22
| Words count in article: 325

线程的启动顺序

  • testThread 线程实例创建之后,调用 start(),表明这个线程处于就绪状态,等待得到 CPU 的时间片之后才会执行
  • 因为 main 方法也是一个线程,所以 testThread 会等待 main() 执行完毕
  • main() 执行完毕后,testThread 线程得到 CPU 的时间片,开始执行
    Read more »

CSS margin:auto;How it Works

Posted on 2020-11-30 => 10:53:25
| Words count in article: 659

Auto

  • margin:auto 通常用作元素水平居中
  • 首先得知道,在定义中 auto 可以随着元素、元素类型和上下文而变化
    • 在 margins 中,auto 可以占用可用空间或者占用 0 px

margin 水平空间

  • 对于 margins , auto 作为 left 和 right 的值的时候,它们会在水平上均分可用空间,因此它们使得元素在中心
  • 但是它们也仅仅适用于水平 margins , 并不能和带有 float、inline 的元素共用;也不适用在 absolute 和 fixed position 的元素中

  • 当只给 margin 其中一边设置为 auto 时,该元素会向另一边倾向

    • 当 margin-left:auto 时,元素的左边会空出一定的空间,而右边空间被元素占完
      Read more »

Java Notes

Posted on 2020-11-27 => 21:01:21
| Words count in article: 9

数组内存分配和引用

  • Read more »
1…567…9
0%
当前浏览器不支持canvas,请更换浏览器后再试
Orekiyuta

Orekiyuta

83 posts
68 tags
RSS
GitHub E-Mail
© 2024 Orekiyuta | Site words total count: 97.7k
京ICP备2021002172号-1