Start
Vue-cli 版本 (2x)
下文基于2x版本 , 版本跟进需要查看官方文档 👉Vue CLI
先查看一下 Vue-cli 项目构建工具版本信息并安装 Vue-cli
npm show vue-cli查看 Vue-cli 的版本信息npm install -g vue-cli@2.9.6选择最新版本vue -V版本确认vue -h查看帮助
Vue-cli 模板
由于用 Vue-cli 工具初始化项目是基于某些模板下初始化的 , 所以先查看下官方推荐的模板 👉vuejs-templates
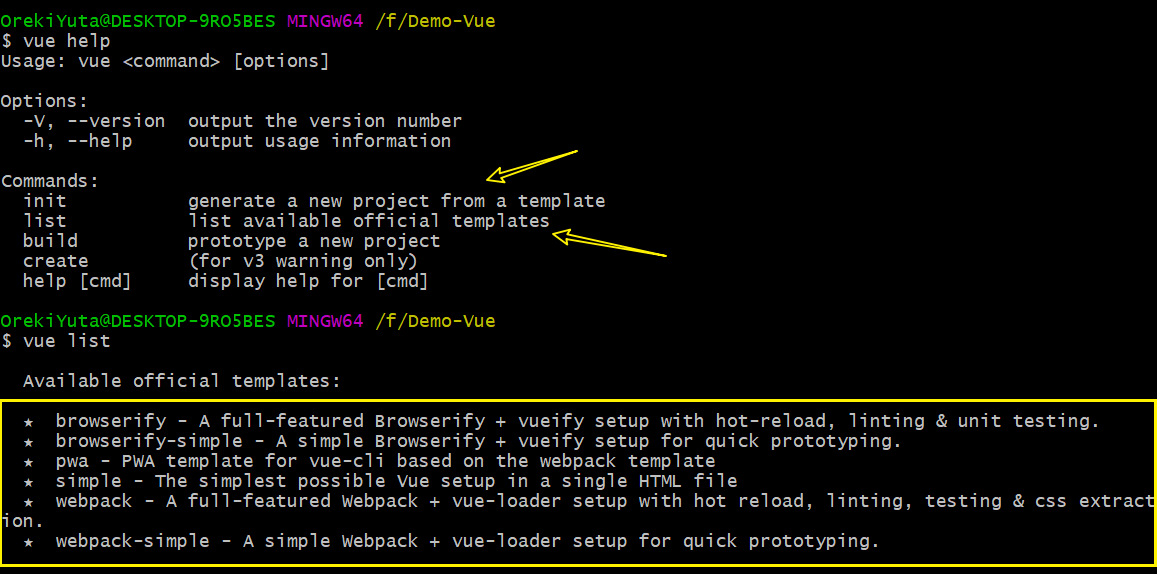
- 这里就采用生态较好的 webpack 👉官方说明文档
Vue-cli 初始化项目
查看下如何初始化
- 两种方式初始化 : 一种是基于官方模板 , 另一种基于第三方模板
创建 webpack 工程
安装选项
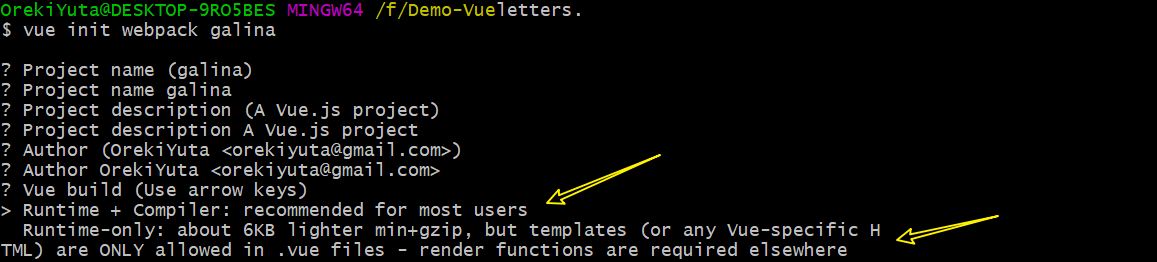
Runtime + Compiler一般选择这个 , 安装运行时和编译器 , 一般有很多动态组件 , 只安装运行时的话不能动态编译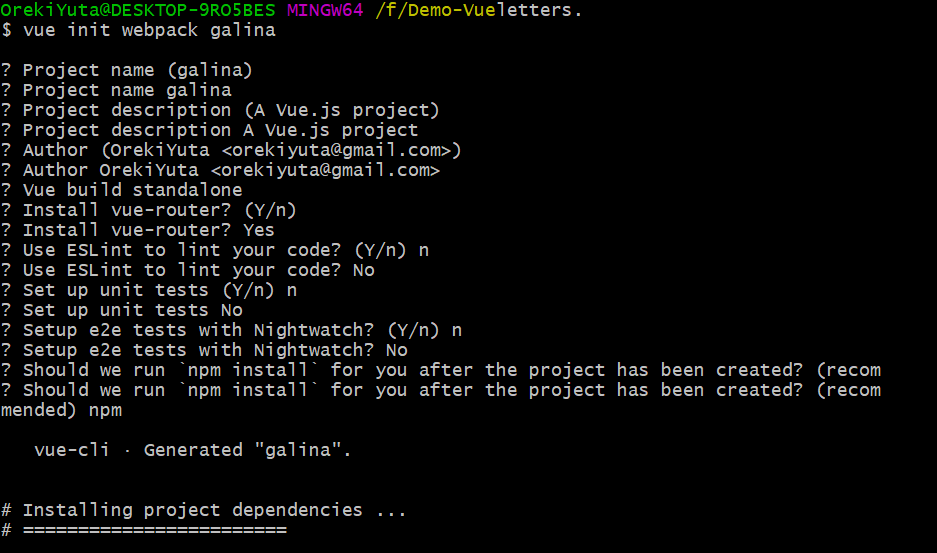
Install vue-router路由Use ESLint to lint your codeES语法检测器Set up unit tests单元测试Setup e2e tests with Nightwatche2e测试Should we run npm install for you after the project has been created选择包管理器
文件结构
1 | . |
- 更多详细可查看官方文档 👉webpack
运行与发布 webpack
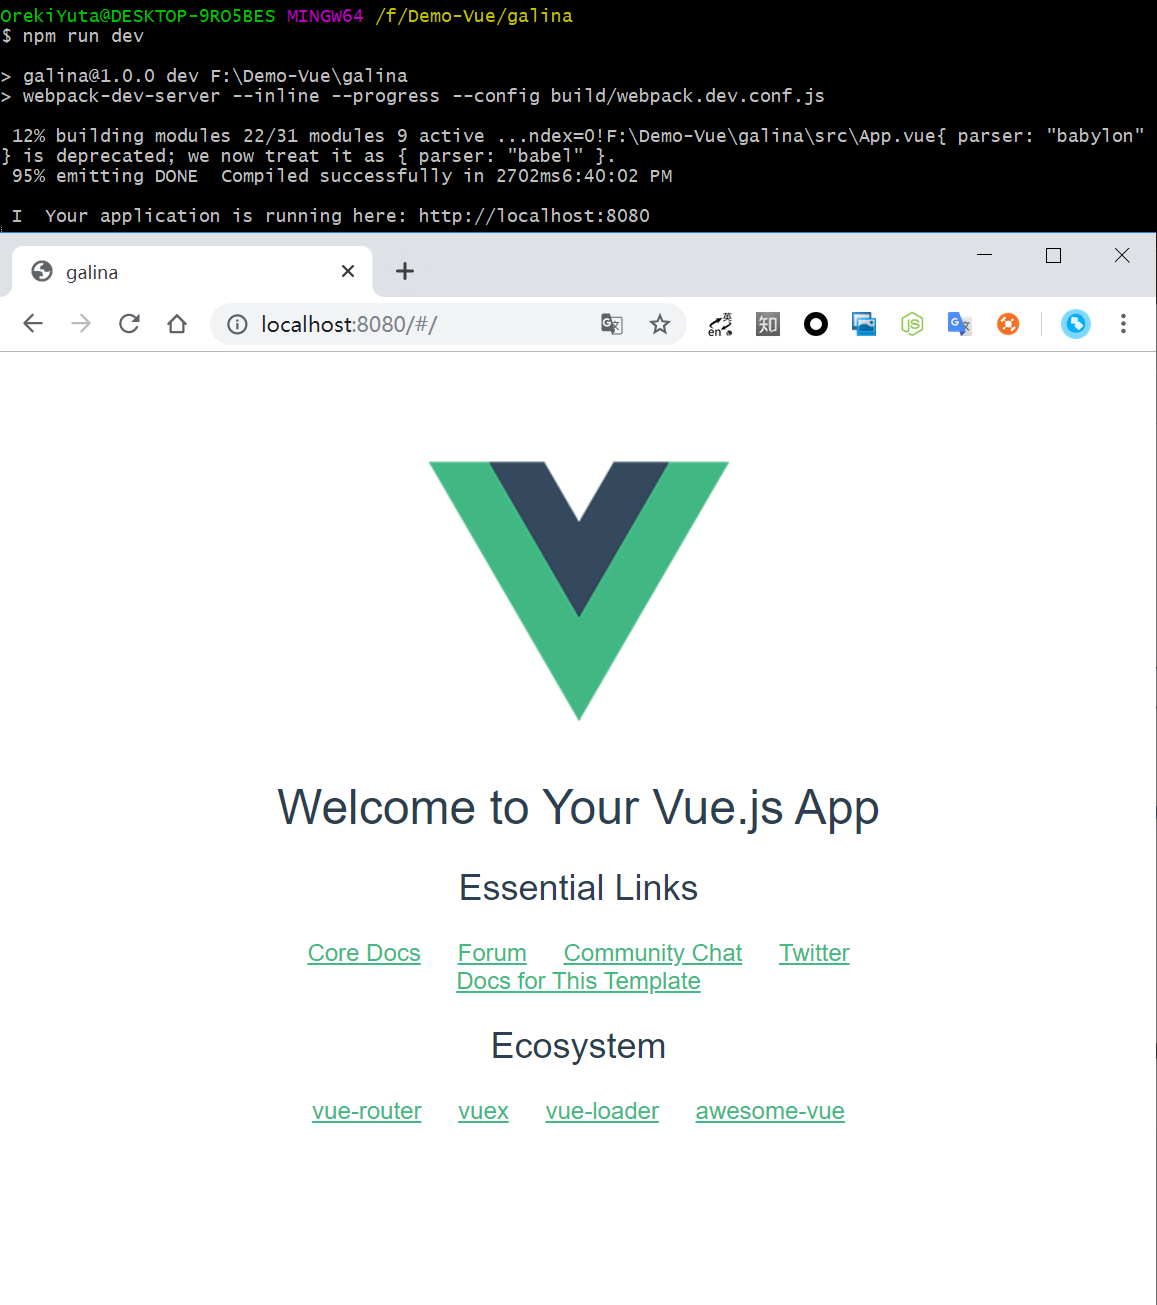
npm run dev / npm start

npm run dev只是个简写形式 , 实际运行的命令写在项目根目录下的 package.json 中
可见
npm run dev和npm start是一个效果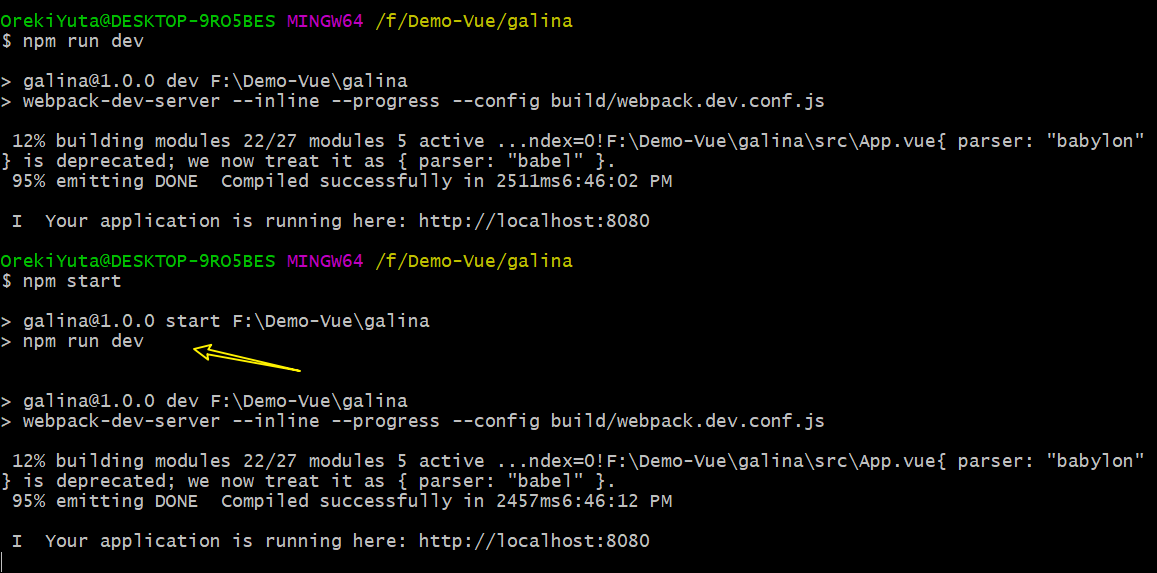
设置依赖
设置生产环境的依赖列表、指定 vue 和 vue-router 版本依赖

可修改为当前最新版本 v2.6.10 (2019.12.09)
^符号的意思是使依赖包向后兼容比如当前我的依赖为
"vue": "^2.6.10"然后过了一个月 , 假设 vue 的版本更新到了 2.8.10
当我们再次执行
npm install的时候 , 它会更新 小版本号 和 补丁版本号 , 依赖就变成了"vue":"2.8.10"然后过了半年 , 假设 vue 的版本更新到了 3.1.0 , 而它的 2.0 版本最后的版本号为 2.9.10
同样执行
npm install, 依赖变成"vue":"2.9.10"大版本号 不会改变
去掉
^符号可精确指定版本 , 避免版本更新影响
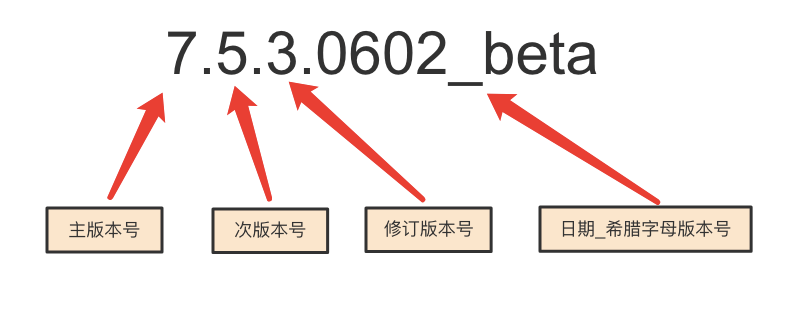
npm 版本号规范
如果一个项目打算与别人分享,应该从 1.0.0 版本开始。以后要升级版本应该遵循以下标准:
补丁版本(修订版本) : 解决了 Bug 或者一些较小的更改,增加最后一位数字,比如 1.0.1
小版本(次版本) : 增加了新特性,同时不会影响之前的版本,增加中间一位数字,比如 1.1.0
大版本(主版本) : 大改版,无法兼容之前的,增加第一位数字,比如 2.0.0
了解了提供者的版本规范后, npm 包使用者就可以针对自己的需要填写依赖包的版本规则。
作为使用者,我们可以在 package.json 文件中写明我们可以接受这个包的更新程度(假设当前依赖的是 2.6.1 版本):
如果只打算接受补丁版本的更新(也就是最后一位的改变),就可以这么写:
1
2
3
2.6
2.6.x
~2.6.1 //波浪号只会更新补丁版本号如果接受小版本的更新(第二位的改变),就可以这么写:
1
2
3
2
2.x
^2.0.1如果可以接受大版本的更新(自然接受小版本和补丁版本的改变),就可以这么写:
1
x
总的来说、三种版本变化类型,接受依赖包哪种类型的更新,就把版本号准确写到前一位。
浏览页面
npm run dev 运行查看一下
npm run build
npm run build 打包发布
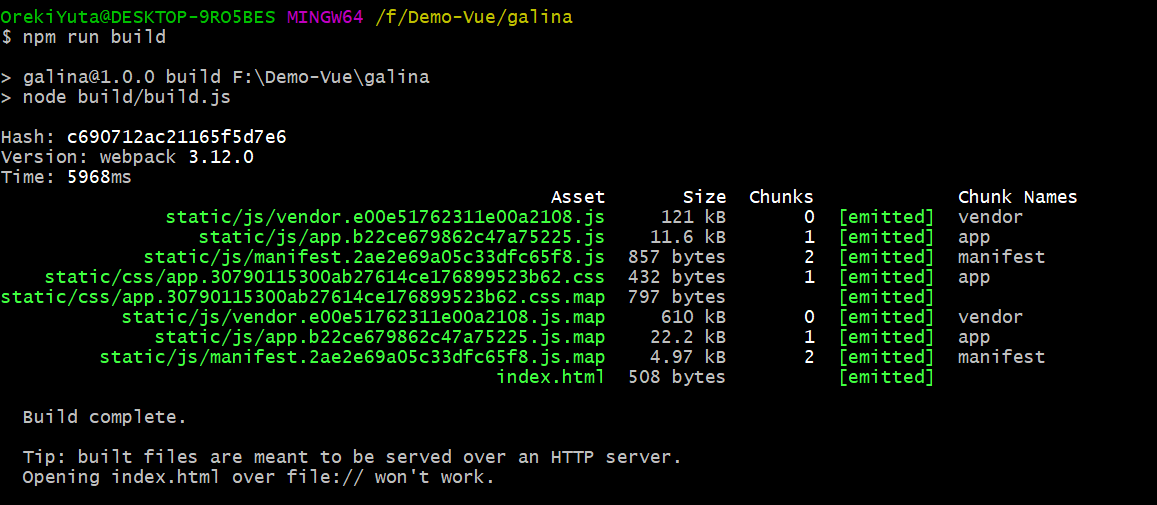
这个执行过程 把在开发环境写好的代码 编译并加密后 打包成 前端页面的静态文件
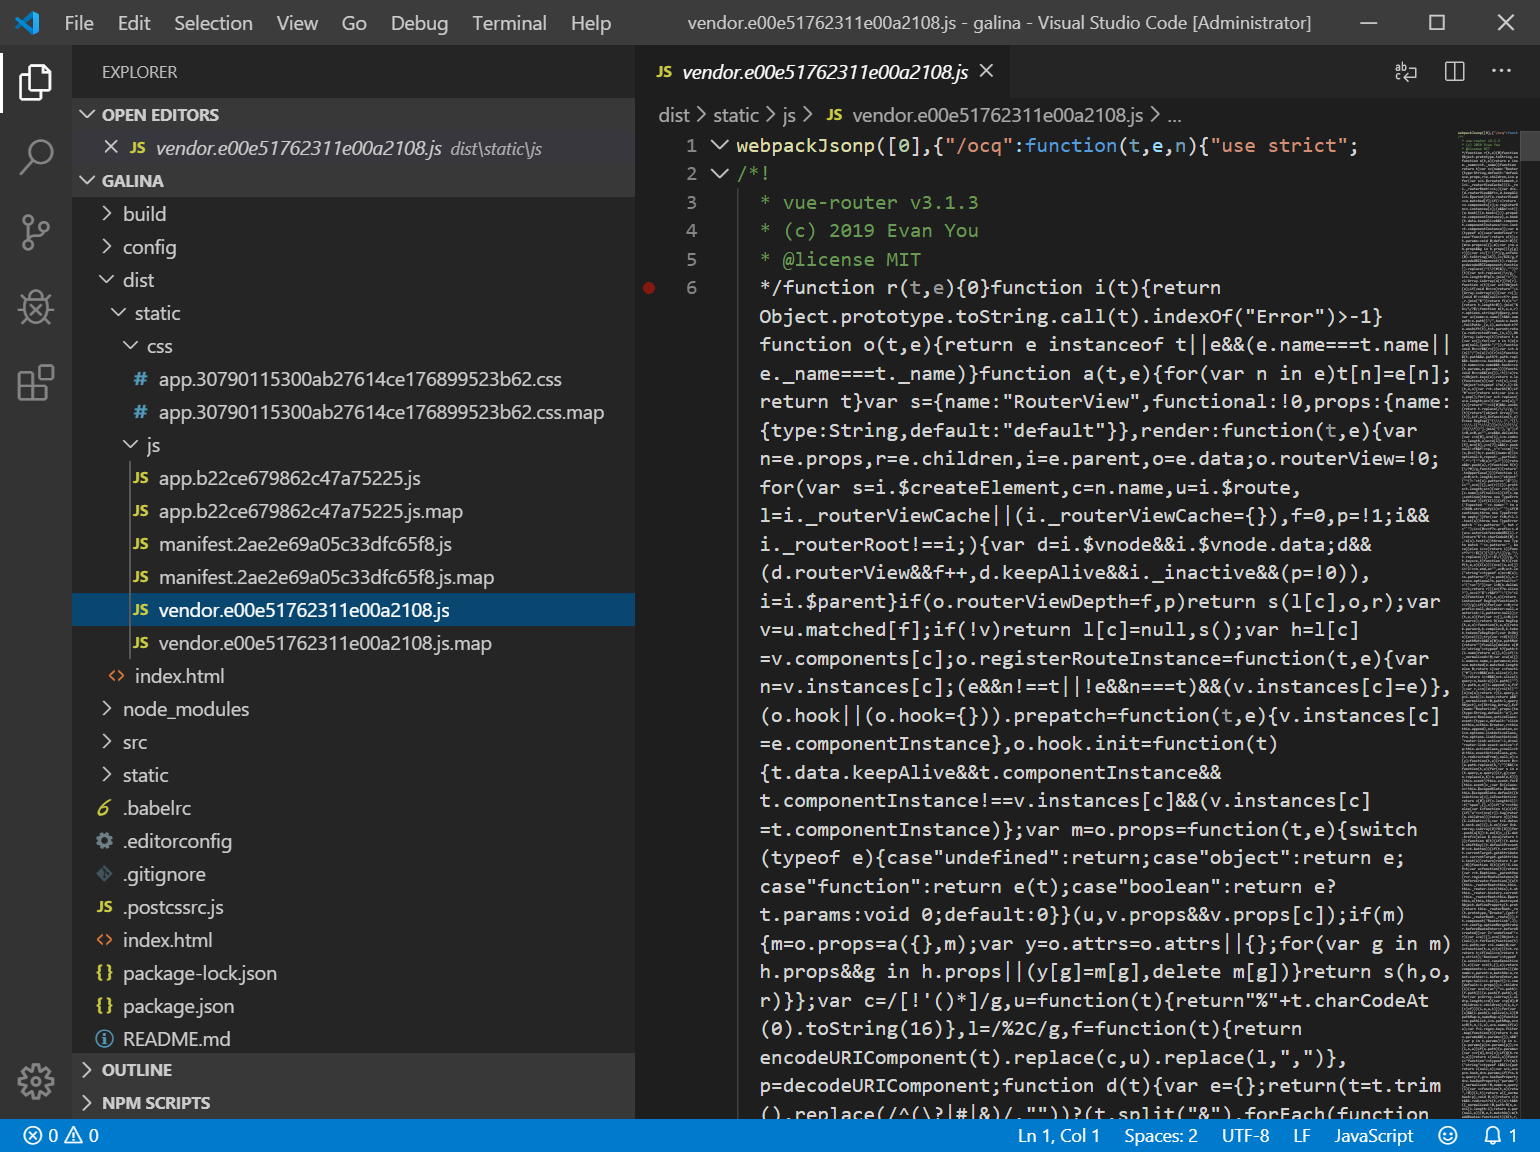
打包完成的文件在项目根目录下的 dist文件夹内
code .VScode 打开当前目录命令- `shift + alt + f 格式化代码
引入组件库
作为个人开发 , 实际写的时候 , 一个个组件去写的话工作量就太大的了。这时不妨采用一些开源的组件库。
引入Bootstrap组件
npm install bootstrap --save-exact引入后 , 就可在 package.json 中看到依赖的 bootstrap 版本了在
/src/main.js中添加import 'bootstrap/dist/css/bootstrap.min.css'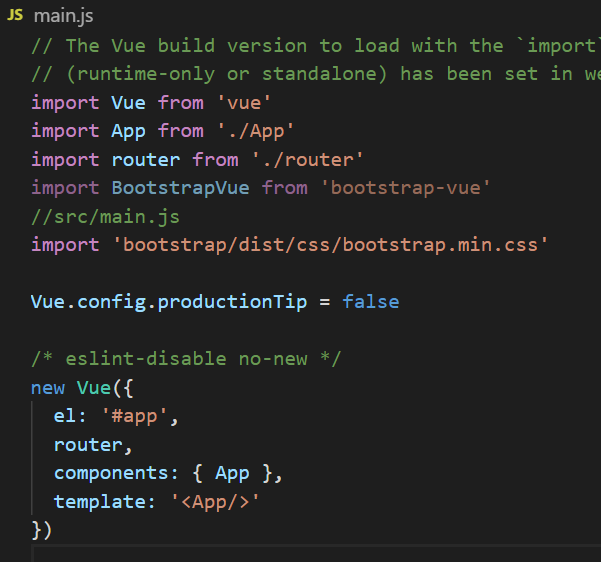
测试引用是否生效
在
/src/App.vue中添加测试代码(这里的用法就和普通的用法一样)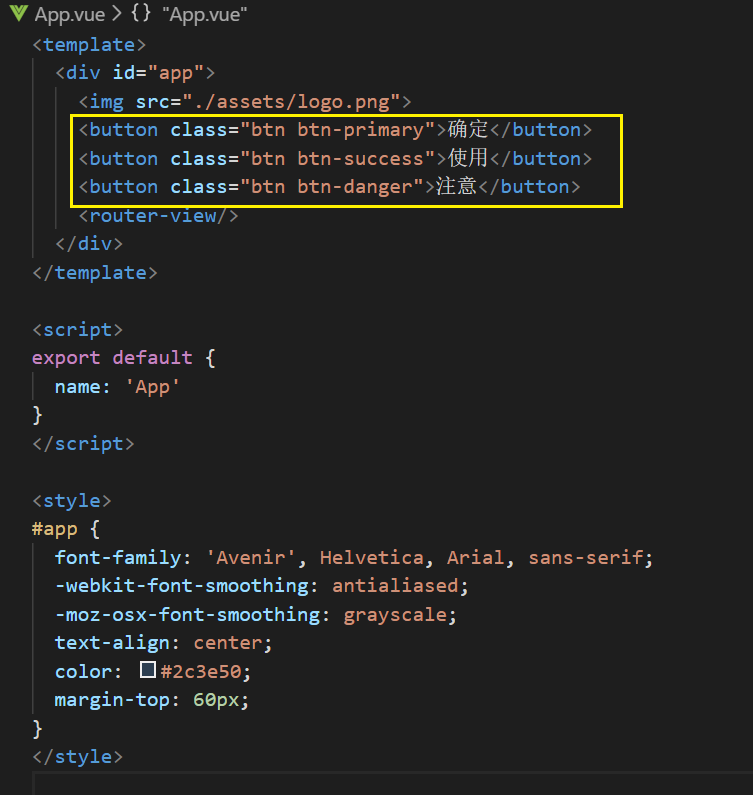
npm run dev预览下效果
熟悉后就可按照官方提供的组件形式使用
axios
去官网查看一下👉axios
安装axios
npm install --save axios vue-axios
注册组件
在/src.main.js中引入 axios 和 vue-axios , 然后注册到 Vue 全局组件中
1 | import axios from 'axios' |
尝试访问 API
在 /src/components/HelloWorld.vue 中写入
1 | <template> |
- 首先设置了个 content 变量来保存数据
- 然后在 Vue 的生命周期函数 mounted 中通过 axios 请求数据
- 设置了 response 变量接受数据然后再赋给 content
运行一下、可见浏览页面有数据返回了

组件结构
组件同一放在 /src/components 中
1 | <template> |
一个组件内一般由 <template/> <script/> <style/> 组成
<template/>
组件标签
<script/>
Js 脚本用的是 ES6 语法
import ...导入各种库export default { }输出该组件data ()data 是方法
<style/>
该组件所应用的样式
scoped属性 : 加上该属性说这个样式单只对该组件产生影响 , 一般还是加上 , 避免影响其他组件和全局设置
工程结构
webpack模板生成的工程结构
👉webpack
👉webpack-cn
常用结构
1 | . |
- build : webpack打包工具设置
- config : 整个工程配置文件
- src : 开发源文件 , 基本开发都在这里
- static : 静态文件 , 编译时会自动直接复制到发布文件夹
- index.html : 入口文件
执行过程⭐
关注这个五个文件 : index.html 、 main.js 、 App.vue 、 index.js 、 HelloWorld.vue
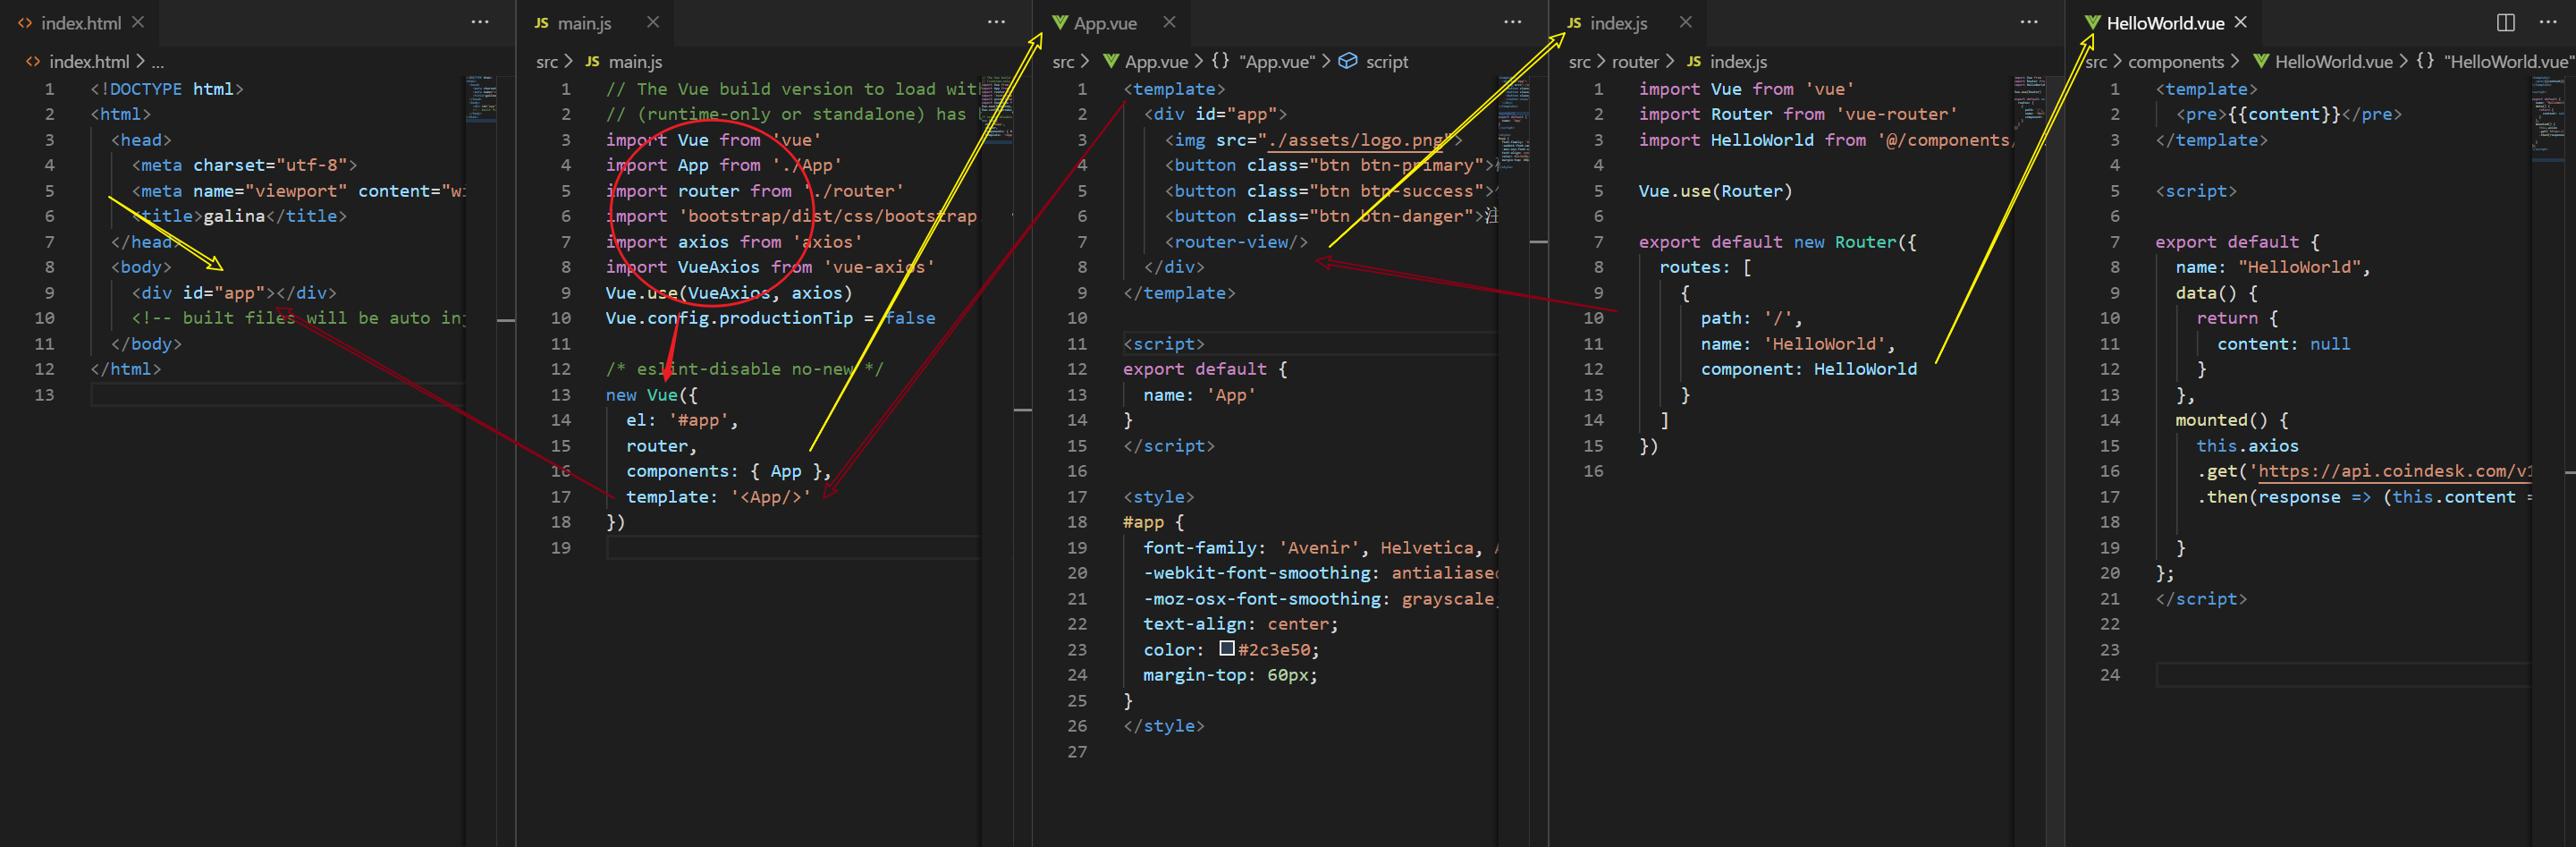
首先是在 main.js 中实例化 Vue 对象 , Vue 对象 el 属性选择了 id=”app” 的元素 , 就是 index.html 中的
<div id="app"></div>然后定义了 Vue 对象的 template 为
<App/>, 这里我们先注释掉 components 观察一下页面元素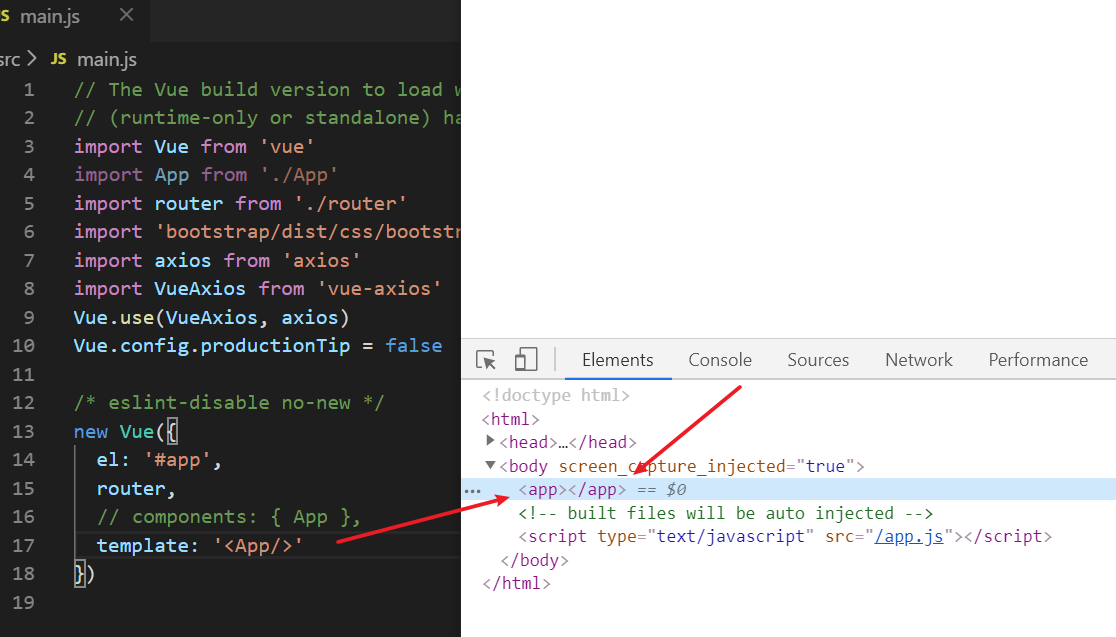
- 可见 template 中定义的
<App/>标签会替换掉 index.html 中的<div id="app"></div> - template 中定义的标签 不区分大小写
- 可见 template 中定义的
同时也指定了路由元素 router , 详写为
router : router接着在 Vue 对象中引入 子组件 App , 也就是 App.vue , 可见 main.js 顶部引入的文件
同理 , 子组件会替换掉父组件的标签 , 所以最终页面的标签就变成了 App.vue 中的
<div id="app"></div>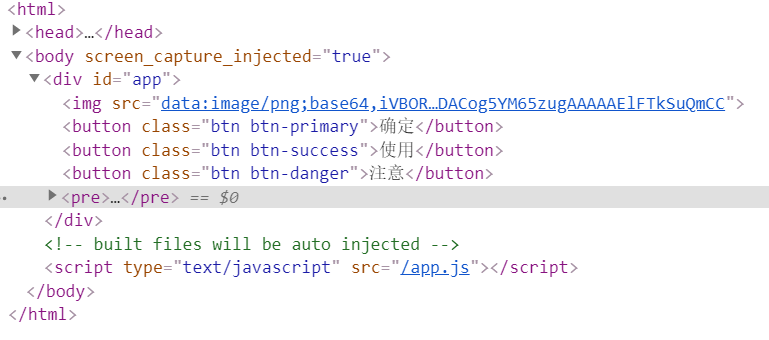
- 整个替换流程为 : index.html
<div id="app"></div>← main.js<App/>← App.vue<div id="app"></div>
- 整个替换流程为 : index.html
最后路由的部分就比较明朗了 , 先在 index.js 中通过 组件名 引入自定义的组件 , 然后显示在预先在 App.vue 占位的
<router-view>中对于这些文件的组装方式就是 webpack 需要做的了 , 大概是把 .vue 组件和相关 Js文件统一打包组装起来最终形成单页静态文件 ; 执行
npm run build就可看到生成的哪些文件
路由⭐⭐⭐
安装路由
npm install vue-router
路由设置
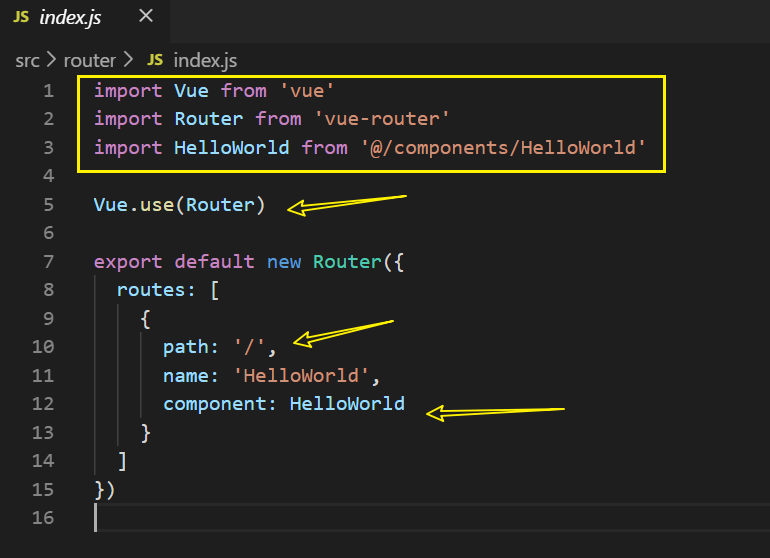
- 在
/src/router/index.js中设置 - 首先在 components 文件夹中写好一个组件 , 例如 HelloWorld.vue
- 然后 import 导入该组件 , 最后在 routes 中把该组件绑定 URL , 这样就完成了 URL 对组件的映射
静态路由例子
关键点
- 🎈path:’’
- 🎈component:
代码
先写三个组件 About 、HelloWord 、 News , 然后设置路由预览一下
About.vue
1 | <template> |
HelloWord.vue
1 | <template> |
News.vue
1 | <template> |
index.js
1 | import Vue from 'vue' |
App.vue
1 | <template> |
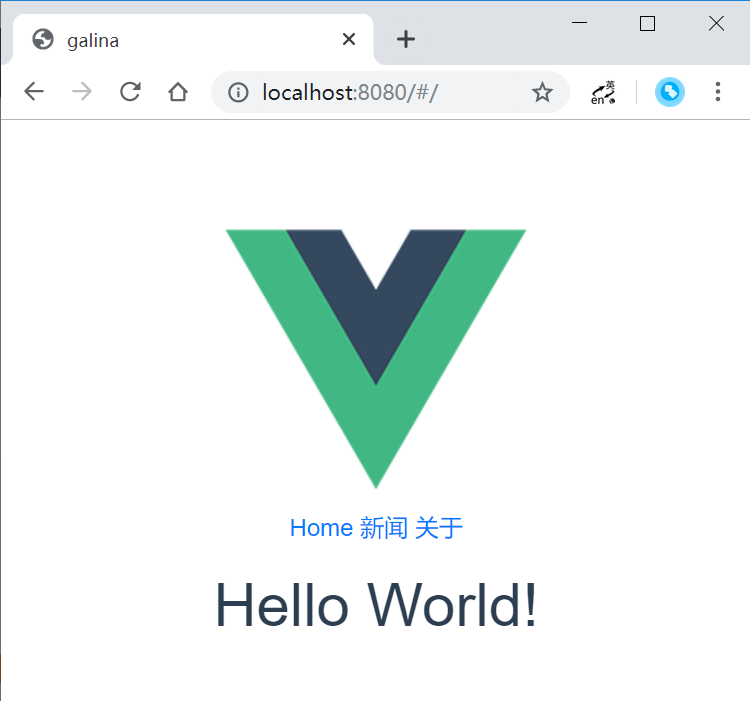
页面


动态路由
指在URL路径中含有动态参数的路由,比如说:/player/1, /player/2, /player/3 …
关键点
🎈path: '/:X '
代码
先创建组件并设置路由
Player.vue
1 | <template> |
index.js
1 | import Vue from 'vue' |
App.vue
1 | <template> |
分析

运行测试页面发现在 “库里” 和 “哈登” 之间切换时 , URL有切换但是数据不更新 , 始终为初次选项的数据
原因在于进入页面时 , Player 组件还没实例化
当我们点击第一个选项时 , 例如 “库里” ; 此时 Player 组件实例化完成 , 不再实例化了 , 也就是执行过 mounted 方法了
然后点击 “哈登” , 也不会再执行 mounted 方法了 , 这是 Vue 设计时考虑到的问题 , 为了提高性能不能总是实例化对象 , 这样会对内存消耗大
添加 beforeRouteUpdate 方法即可解决此问题 ; 让第二次点击事件进入该方法
嵌套路由
嵌套路由是指在动态路由的基础上再加上附加的嵌套URL(即:组件),比如说:(/player/:uid/*) /player/1/profile , /player/1/stats 等
关键点
🎈children:[ ]
代码
Profile.vue
1 | <template> |
Stats.vue
1 | <template> |
Player.vue
1 | <template> |
index.js
1 | import Vue from 'vue' |
App.vue
1 | <template> |
分析
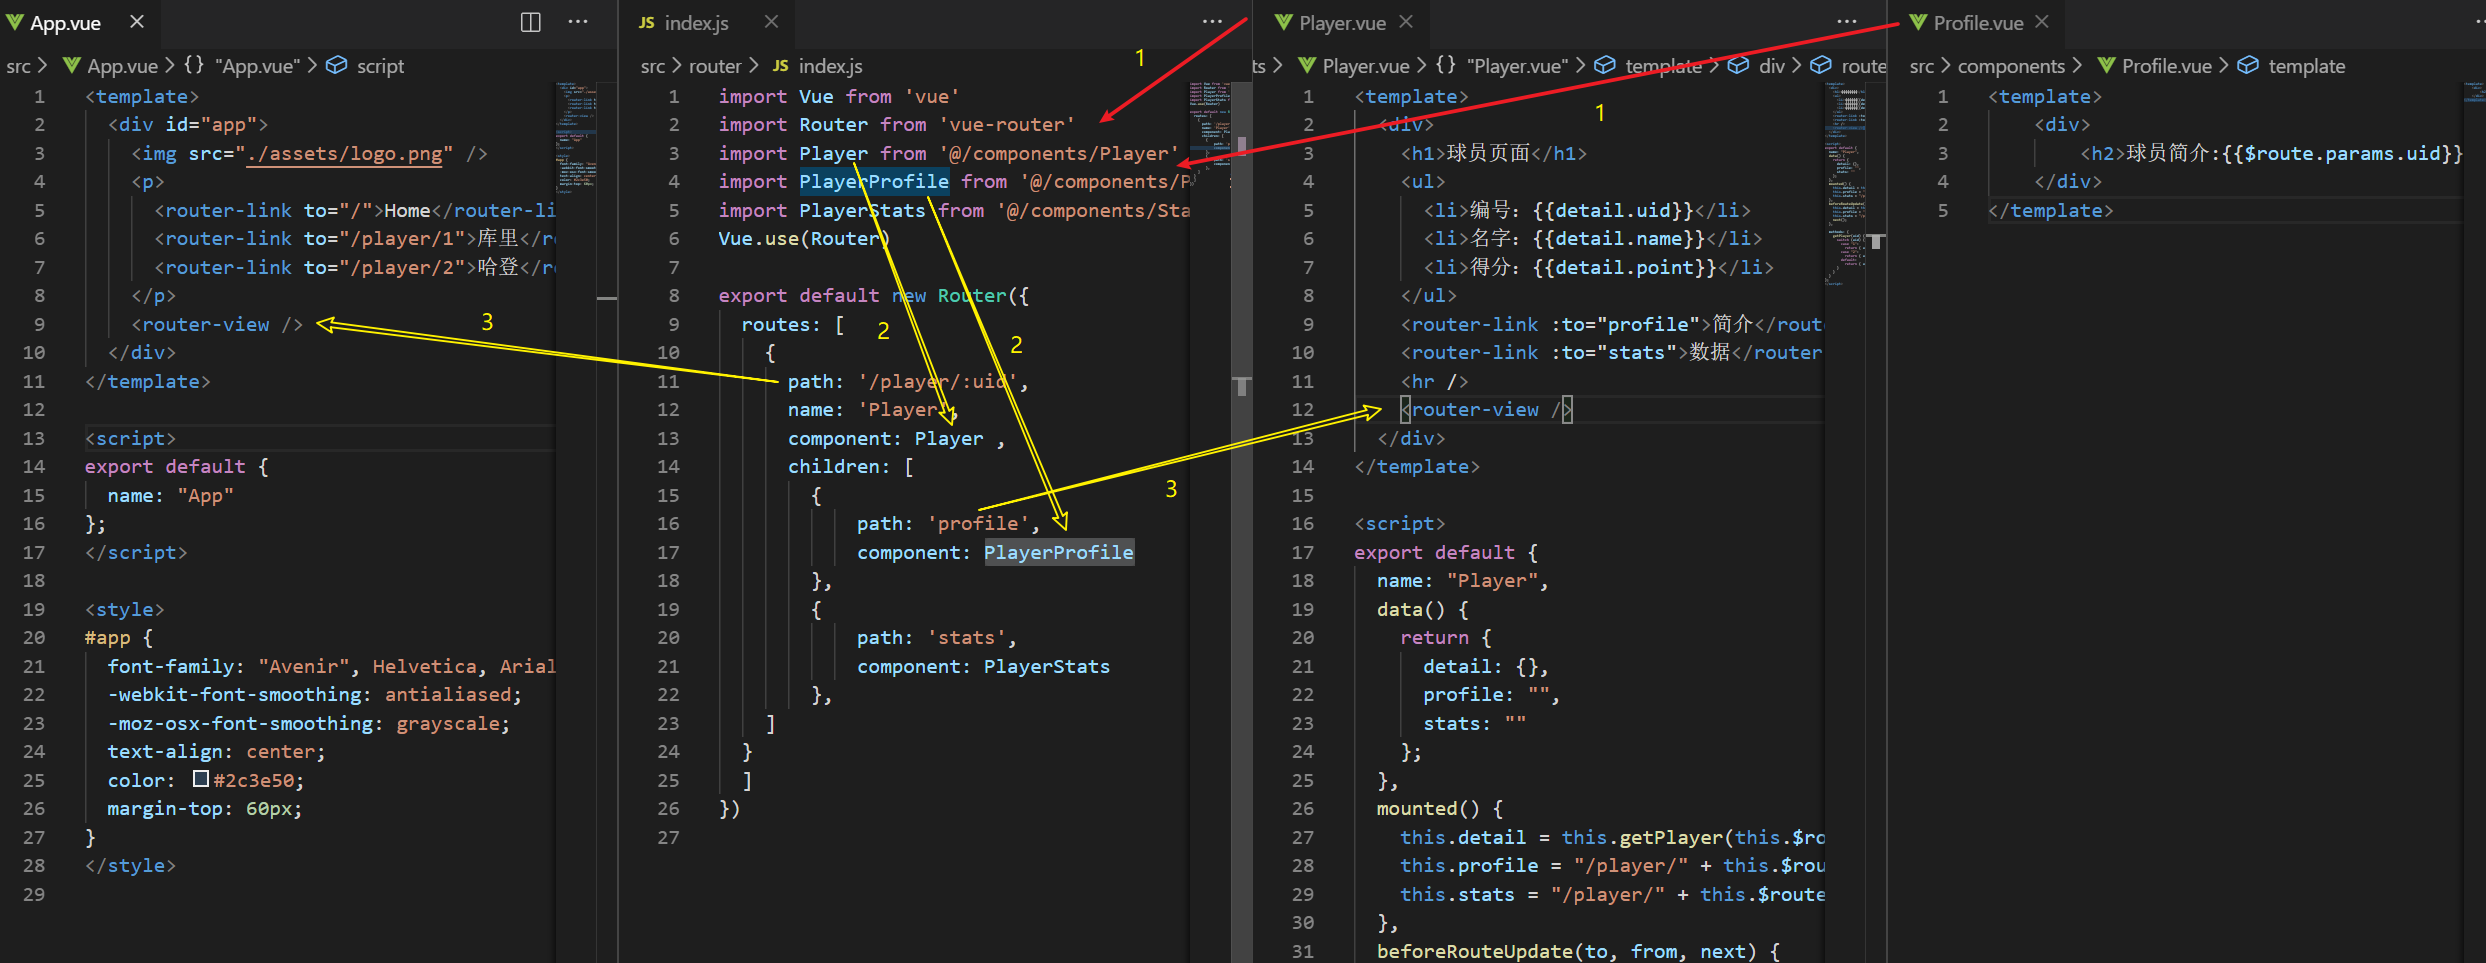
在一个路由对象中基于原有的组件创建子路由对象 , 在 children 属性内添加多个路由对象 , 然后在原有的组件中添加 <router-view>
路由跳转多种用法
关键点
- 🎈$router.push
- 🎈
:to=" "
代码
现在基于上面的 App.vue 做改进
App.vue
1 | <template> |
$router.push 重定向
传递 path 路径
1
this.$router.push({ path: `/player/${uid}` });
1
this.$router.push({ path: `/player/${uid}/stats` });
传递 name 组件名 , 重定向到该组件绑定的 URL 同时传递参数
1
this.$router.push({ name: 'Player', params: { uid: UID } });
1
this.$router.push({ path: '/player', query: { uid: UID }});
利用浏览器进行前进后退
this.$router.go(-1);this.$router.go(1);
:to=" " 直接传递对象
:to 也就是 v-bind:to
1 | <router-link :to="{ name: 'Player', params: { uid: 1 }}">库里111</router-link> |
1 | <router-link :to="{ path: '/player/2/stats' }">哈登222</router-link> |
多组件整合到同一路由
关键点
- 🎈components
- 🎈
<router-view name=" ">
代码
Header.vue
1 | <template> |
Sidebar.vue
1 | <template> |
Detail.vue
1 | <template> |
index.js
1 | import Vue from 'vue' |
App.vue
1 | <template> |
分析

这里的关键在于 components 和 <router-view name=" ">
URL 别名与重定向
关键点
- 🎈路由别名 alias
- 🎈重定向指令 redirect
代码
在 嵌套路由 的代码基础上作修改
About.vue
1 | <template> |
index.js
1 | import Vue from 'vue' |
App.vue
1 | <template> |
分析
alias: '/aboutme'就是给path: '/about'中的 /about 路径起了个别名 , 访问 /aboutme 和 /about 是一个效果path: '/curry'和redirect: '/player/1'组合起来就是 , 当访问 /curry 的时候会重定向到 /player/1redirect: { name: 'About' }也可以用组件的名称redirect: '/about'同上redirect: '/aboutme'重定向到别名也是可以的
多参数路由
关键点
🎈路由属性 props
代码
User.vue
1 | <template> |
index.js
1 | import Vue from 'vue' |
App.vue
1 | <template> |
分析
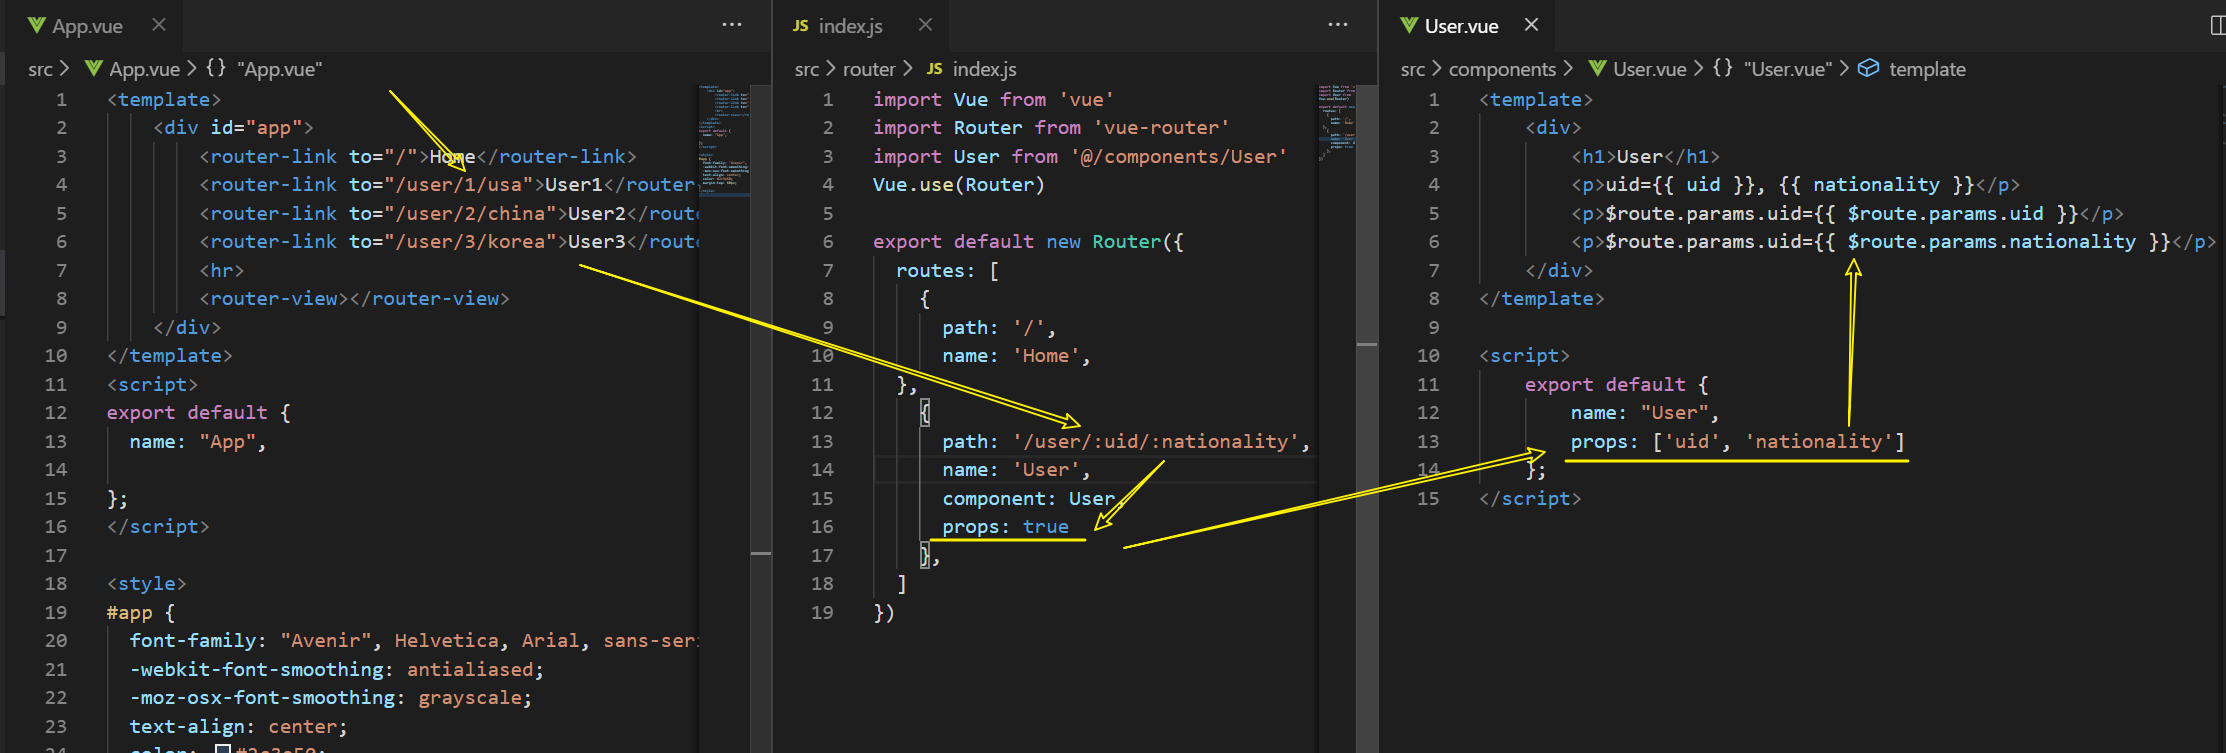
这里主要在于在路由对象里开启 props 属性 , 同时在对应组件里也要设置 props 变量来接收参数